Pain à l'Ancienne
This recipe is a variation of Pain à l'Ancienne (old fashioned bread) that appeared in The Bread Baker's Apprentice, by Peter Reinhart.
No sweetener is used in this recipe but instead relies on cold fermentation so that enzymes break down complex carbohydrates in the dough to simple sugars. A temperature of about 40°F is maintained to prevent the yeast from consuming sugars developed by enzymes. The net result is a loaf with superb natural sweetness. Very little kneading is required.
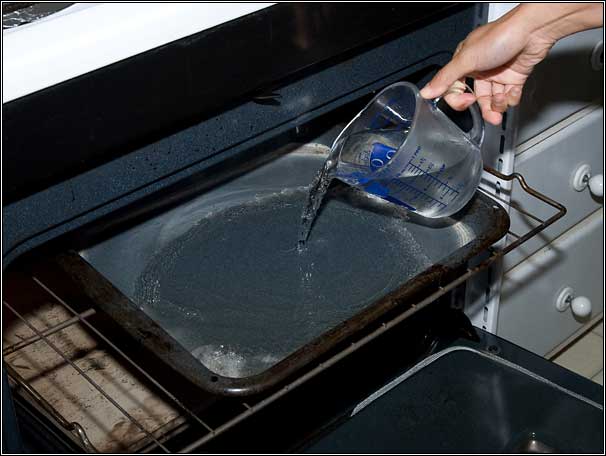
Reinhart's recipe calls for heating the oven to 550°F (if possible) and then reducing the temperature to 475°. I Bake at 475°F for the entire time. Baking time was increased from 25 to 45 minutes (a boule is larger than a baguette) and no spraying is necessary since water in the pan has a chance to boil before the dough starts to rise. Two cups of water, rather than one cup, are used for steam.
This page is also available as a PDF document.
Equipment
The following equipment is needed:
- pizza stone
- pizza peel
- oven pan
- parchment paper
- one large bowl, one small bowl
- dough scraper
- kitchen scales that measure to the nearest gram
- small strainer
Ingredients
Only four ingredients comprise this loaf:
Professional bakers specify ingredients by weight. This is especially recommended for flour as it can easily fluff-up or compress rendering volume measurements inaccurate. Kitchen scales are inexpensive and highly recommended. In bread recipes flour counts as 100% and the remaining ingredients are based on this value.Flour. White bread flour. I recommend King Arthur's Unbleached All-Purpose Flour that is unbleached and unbromated. Excellent flavor and has 12.7% protein (12-15% is considered bread flour). If not available choose a bread flour such as Gold Medal.
Water. Water at 40°F. Place a jug of water in the refrigerator and by the next day it will be cold enough.
Yeast. Any brand of instant yeast will do just fine. But if you bake a lot of bread purchase a 16oz packet of SAF Instant Yeast (red label). Check your local supermarket (WinCo has it for $3) or purchase online. Store in an airtight container in the freezer and it will last for years.
Salt. Standard table salt works fine.
Reinhart recommends the percentages shown in the table below. For yeast and salt I use volume measurements after confirming that they yield the correct weight. For consistency and accuracy I load up the measuring spoon and then level it off with a knife.
Ingredient Percent Weight Volume Flour 100 640g Water 79.6 510g Yeast 0.7 5g 2 tsps Salt 2 13g 2 tsps
The recipe calls for approximately a 24 hour stay in the refrigerator. At 24 hours the dough is mildly sweet and delicious. Less than 24 hours the dough is a bit salty; more than 24 hour it ferments and becomes sour. When removed from the refrigerator the dough must be brought to room temperature and allowed to rise as quickly as possible. This prevents the yeast from excessive activity that will destroy the natural sweetness created by the enzymes. To achieve this feat a warm oven is utilized.
The Day Before
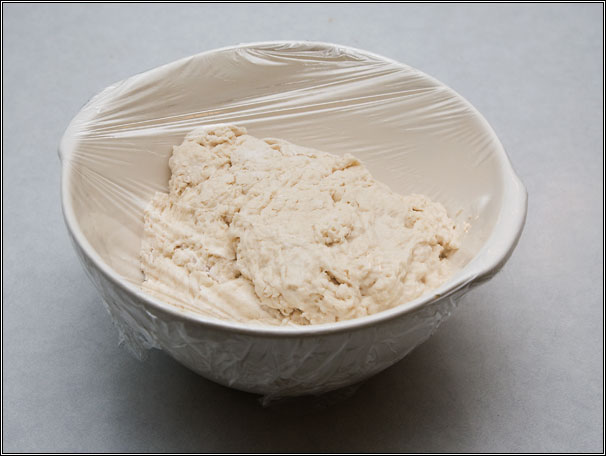
Place a large bowl on scales and add the flour. Then add the yeast and salt. Mix thoroughly with a whisk. Zero-out the scales and add water. Add water, stir, cover with plastic wrap, and place it in the refrigerator for 24 hours. This change produces a soft and tasty loaf.
The Next Day
The goal is to warm-up the dough from 40°F to 70°F, and form it into a loaf, all within two hours. First remove the bowl from the refrigerator, puncture the plastic wrap with a fork to allow the dough to expand, and let it set at room temperature for one hour to take the chill off the dough. During this time prepare the oven by placing a pizza stone on the lowest rack and an oven pan, to hold water, on the top rack.
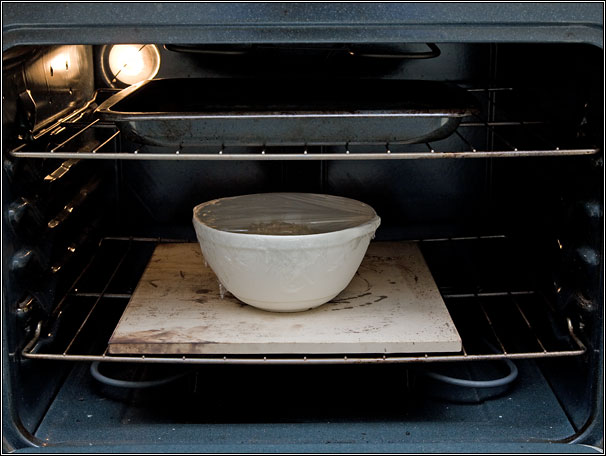
After one hour preheat the oven to 225°F. Turn off the oven after it comes to temperature and place the bowl in the oven. When the dough doubles in size (approximately 30 minutes) remove it from the oven and allow to cool for 30 minutes so it is easy to handle. While it is cooling preheat the oven to 475°F.
Forming
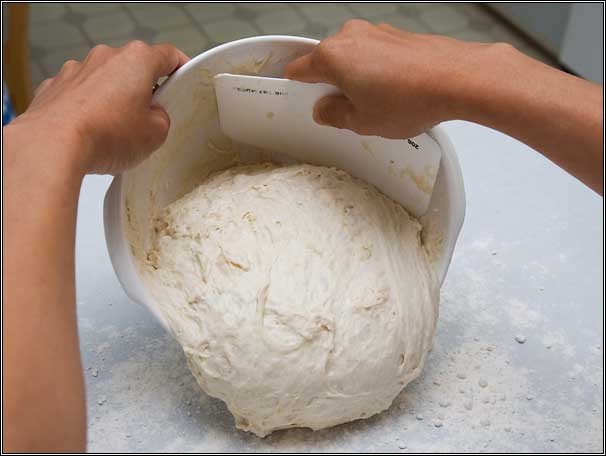
Cover the pizza peel with a sheet of parchment paper. Cover the counter top with a light layer of flour by sifting it through a small strainer. Remove the plastic wrap from the bowl and use a dough scraper to place the dough onto the floured surface
With floured hands stretch the dough out to a square shape and fold the corners in. Flip the dough over and tuck in the bottom edges (palm up) while rotating the dough. When the surface is taut place dough on parchment paper.
Baking
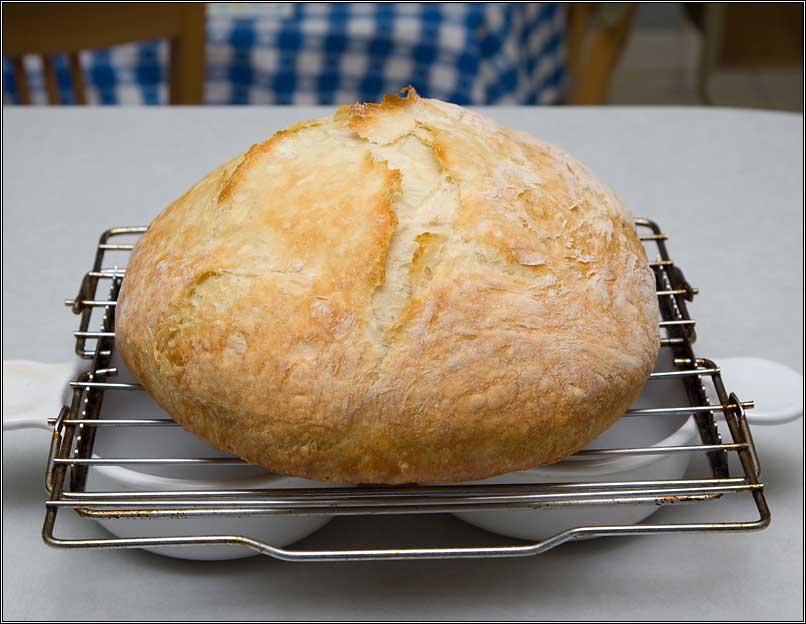
After the oven comes up to temperature add two cups of hot tap water to the pan. Slide the parchment paper from the peel to the stone. Bake for 23 minutes, rotate the loaf 180°, then bake for 13 more minutes so it browns evenly. As my oven does not have a precise temperature control I go more by loaf color than exact time.
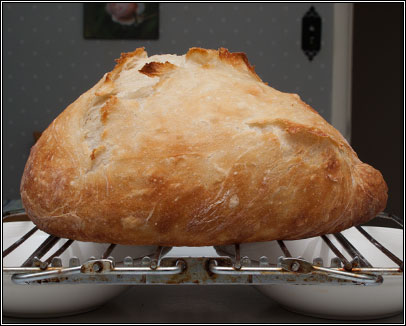
Remove the loaf from oven, set it on a rack to cool, and cover with a cloth. Now comes the hard part. Wait 2 hours before slicing to allow the natural sweetness to fully develop.
tl;dr
Previous day
- Combine 640g flour, 2 tsps yeast, and 2 tsps salt with a whisk
- Add water and combine with a sturdy spoon
- Refrigerate for 24 hours
Baking day
- Remove from refrigerator and let set one hour
- Heat oven to 225°F and turn off
- Place bowl in oven for 30 minutes
- Remove bowl from oven and let set for 30 minutes
- Heat oven to 475°F
- Place a sheet of parchment paper on pizza peel
- Form into loaf and place on parchment paper
- Add 2 cups of water to the pan, and slide loaf into oven
- Bake for 23 minutes
- Rotate and bake for another 13 minutes
- Remove from oven and let cool for 2 hours
After a while all you'll need to remember is this:
60 minutes: room temp
30 minutes: 225°
30 minutes: room temp
23 minutes: 475°
13 minutes: rotate
2 hours: cool
A Few Tips
When warming the dough be sure to leave the plastic wrap on the bowl until you are ready to form the loaf. Removing the plastic wrap too early allows the surface to dry and can create small hard nuggets. After forming the loaf the temperature should be about 70°F.
To prepare a loaf cut it in half with a serrated knife and slice each half with an electric food slicer. If you have children the loaf will be gone the same day. Otherwise freeze the slices in a plastic bag. Partially thaw in a toaster then transfer to a microwave to finish the process.